Not loading - how do I re-enable?
If Outlook terminated during operation, the ClearContext add-in could be disabled. The first step is to restart Outlook and see if that fixes the problem. If this does not work, follow the instructions below to re-enable.
Check if ClearContext has been disabled within Outlook
**Please note that there are two places to check listed below - COM Add-ins and Disabled Items**
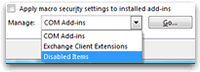
Select File > Options > Add-ins. In the bottom of the Window select Manage: Disabled Items and click Go.... Select the checkbox next to ClearContext. Click Enable.
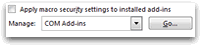
If that doesn't work, select File > Options > Add-ins. In the bottom of the Window select Manage: COM Add-ins and click Go.... Enable the checkbox next to ClearContext
New Installations or Reinstalls
The ClearContext installer normally detects whether the 32 or 64 bit version of Outlook is installed, and will automatically select the matching ClearContext version. In the rare case where one has to manually select the version, the 32/64 bitness of ClearContext needs to match the 32/64 bitness of Outlook. You can verify whether your Outlook is 32 or 64 bits by going to the Outlook File->Office Account->About Outlook screen (may vary by version). By the full version number there will be a 32 or 64 bit label.

When ClearContext is installed - in the Programs section of the Windows Control Panel, the 64 bit version of ClearContext will be listed as a 64 bit version, while the 32 bit version has no bitness description.
Advanced Troubleshooting
The following steps should only be performed if ClearContext has gotten disabled multiple times and you are having trouble re-enabling the add-in through the steps above.
- Shut down Outlook
- Uninstall ClearContext from the Windows Control Panel
- Run the regedit program by clicking in the Windows run box, typing in "regedit" (without quotes) then pressing enter
Navigate in the registry to:
Outlook 2016:
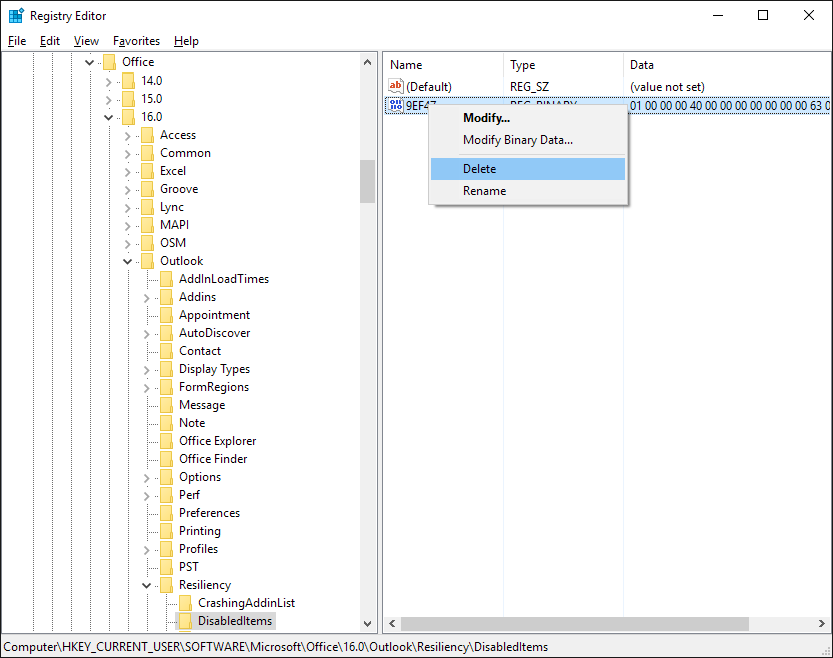
HKEY_CURRENT_USER\Software\Microsoft\Office\16.0\Outlook\Resiliency\DisabledItems
Outlook 2013:
HKEY_CURRENT_USER\Software\Microsoft\Office\15.0\Outlook\Resiliency\DisabledItems
Outlook 2010:
HKEY_CURRENT_USER\Software\Microsoft\Office\14.0\Outlook\Resiliency\DisabledItemsRight click on REG_BINARY entry on the right side, then click delete
Next navigate to the CrashingAddinList entry if it exists:
Outlook 2016:
HKEY_CURRENT_USER\Software\Microsoft\Office\16.0\Outlook\Resiliency\CrashingAddinList
Outlook 2013:
HKEY_CURRENT_USER\Software\Microsoft\Office\15.0\Outlook\Resiliency\CrashingAddinList
Outlook 2010:
HKEY_CURRENT_USER\Software\Microsoft\Office\14.0\Outlook\Resiliency\CrashingAddinListIf the CrashingAddinList exists and there is a REG_BINARY entry on the right side, right click on it and click delete
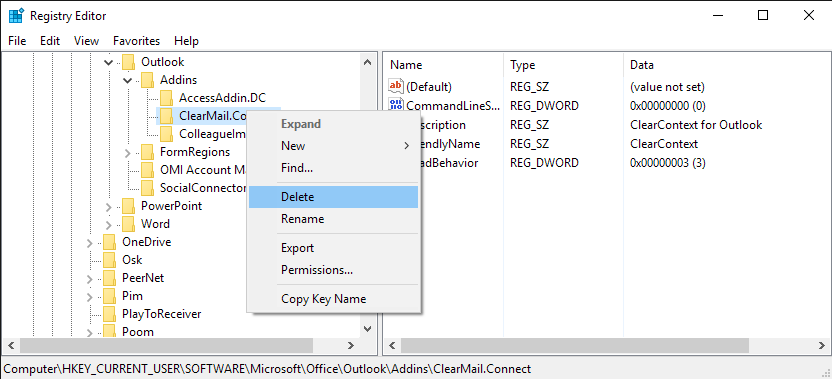
Navigate to HKEY_CURRENT_USER\Software\Microsoft\Office\Outlook\Addins. If there is a ClearMail.Connect entry listed underneath it, right click on it and select Delete
If ClearContext was installed as an administrator, please repeat steps 4-8, except substitute the path HKEY_LOCAL_MACHINE instead of HKEY_CURRENT_USER
Reinstall ClearContext